Tools Needed:
PSP 7.04
My Presets and Shapes
The shapes (.jsl format) go into your shapes folder. The rest of the files go into your presets folder.
- Make a new image, 400x400, 16million colors, transparent background.
- Use your shapes tool and set it on Retain style and vector. Use the pushup shape. You can make it any size you wish.
- In the layer pallette, highlight the back layer, then go to Selections>Selection from vector object. Save that selection to alpha channel, naming it 'back'.
- Go to the layers pallette and right-click on the vector layer and make it into a raster layer. Rename the layer 'pushup'.
- Load your selection from alpha channel and invert it and using your control key and magic wand, click in the transparent area. You may have some stray stuff around the top of the pushup selected too. Use a rectangle selection
and your control key to get rid of those. We just want the front selected.
- Promote this selection to a layer. Rename 'top'.
- Now using your mover tool and your right-click button move your selection down a few pixels.
- While holding down the control key, use your magic wand and click the transparent part of the selection.
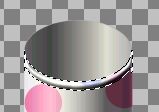
- Invert the selection and control+click in the transparent area. What we want is just that small strip selected. See below:
- Go to Effects>3D Effects>Inner Bevel and apply the pushup preset.
- Copy and paste as new selection and line it up at the bottom of the pushup.
- Open up a new 400x400 image, same as above.
- Apply the shapes tool, same settings except use the ice cream shape. Again, you can make it any size, but try and get it close to your first image.
- Go to Selections>from vector object. Save that selection to alpha channel naming it icecream.
- On the layer pallette, select 'back' and do like you did in step 14.
- Convert the layer to a raster layer. Make sure that there is nothing selected.
- Go to Effects>Artistic Effects>Brush Strokes and apply the pushup preset.
- Load your back from the alpha channel.
- Go to Colors>Adjust>Brightness/Contrast and set it with Brightness=18 and contrast=0. Apply. Deselect.
- Save as Pushcream. Never know when you might need it for something else.:)
- Copy it and paste it as a new layer onto your pushup image. You may have to use your deform tool to get it the right width. You need it just a tad thinner than your pushup shell.
- Move the ice cream in between the shell and the top layers.
- Make your ice cream layer active and make a new layer and name it shadow.
- Go to your top layer and select all, then float. Contract by 3.
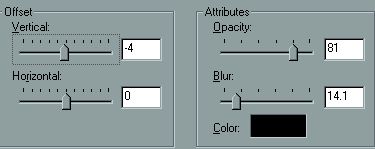
- Go to your shadow layer and apply a drop shadow with these settings:
- Activate your ice cream layer and select the area surrounding the ice cream.
- Go to your shadow layer and click the delete key.
- Hide Layer1 and merge visible the rest of the layers.
- Open a new 400x400 image, same settings.
- Make your forground white. Using the line tool set at 12, antialias unchecked, draw a line down the center of your canvas.
- Go to Effects>3D Effects>InnerBevel and apply the pushup2 preset. This is your stick for the pushup.
- Save this for later use.
- Copy and paste as new layer onto pushup image. Move it below the pushup layer and line it up in the middle.
- Activate the stick layer and make a new layer and name it 'shadow'.
- Activate the pushup layer and select all and float selection. Contract by 3 pixels.
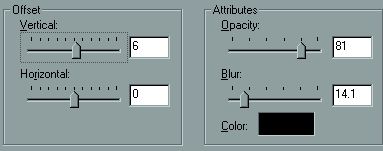
- Activate the shadow layer and apply a drop shadow with these settings:
- Activate the stick layer and select the transparent area. Click your delete key.
- Hide Layer1 and merge visible the remaining layers.
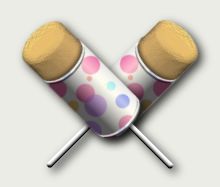
- You have completed the pushup, Congratulations!!!!!
Tutorial Index
Website design ©Bluegenie2 Designs
|