Handprints
After I did the footprints tutorial,
I had the idea to do a handprint tutorial too.
I got my hand wet and covered it in flour
and pressed it on a dark surface to get my model.
So this hand is actually my hand.
I made a zip file containing the selections
of both the left and right hand.
I, also, included the vector image
so you can mess with it if you want.
You can get the zip file here.
I would suggest unzipping it into a temp folder,
then putting the selections in your selection folder in psp
and putting the psp vector image
somewhere where you can find it again.
For this tutorial, I have used the image below for the background.
But you are free to use anything you want
for the background.

If you are using a background image, have it open in your psp.
Open up a new image 500x250 pixels,
16 million colors, transparent background.
Now flood fill with the image or color of your choice.
Go to Selections>Load from disk and load lefthand.sel.
Using the mover  tool and your right mouse button,
position the selection where you want it.
Go to Selections>Invert and invert the selection.
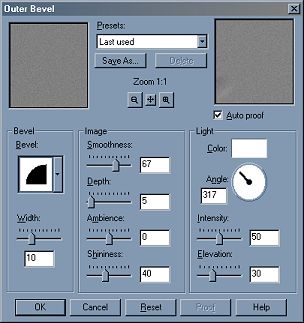
Go to Image>Effects>Outer Bevel and set it up like below.
Now go to Selections>Invert and invert your selection again.
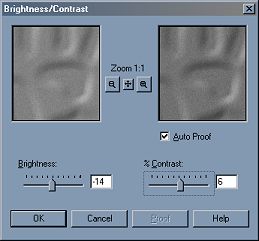
Go to Colors>Adjust>Brightness/Contrast
and set it up like below.
Go to Selections>Select None.
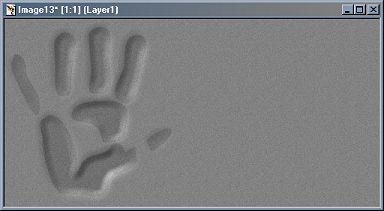
My image looks like this, but I have reduced the size a bit.
Now go to Selections>Load from disk and load righthand.sel.
Make your foreground white
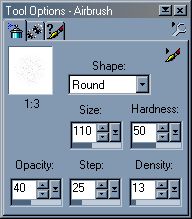
Click on your airbrush  tool and set it up in the tool options like this.
Now airbrush your hand, once over it should be fine.
Go to Selections>Select None
Now, you have a floured handprint and an imprinted handprint, like below.
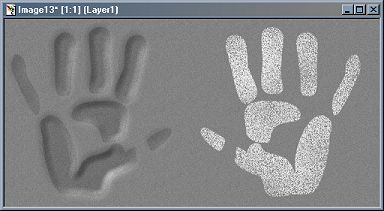
These are just 2 of the infinite uses for a handprint.
Be creative and have fun with it!!!
Tutorial Index
Website design ©Bluegenie2 Designs