
You must have psp7 and KPT6 in order to do this tutorial.
Other filters needed:
- Lunar Cell
- Glitterato
- Flood
All availiable Here.
- Open up a new image, 500x400, 16million colors, black background. Rename your background layer to 'Moon'.
- Go to Effects>Plug-in Filters>KPT6>KPT Sky Effects and set it up like below, thru the presets.
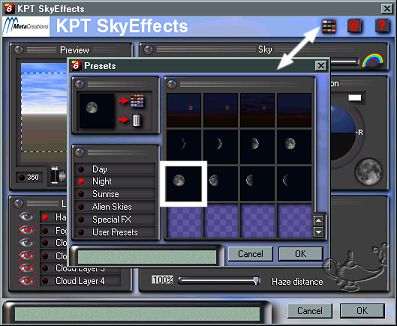
Leave the other settings at default and click okay.
- Add a new layer. Name it 'Stars'.
- Make your 'Moon' layer active and using the magic
 wand, (tolerance 10, feather 0, Rgb value)click anywhere in the black area. wand, (tolerance 10, feather 0, Rgb value)click anywhere in the black area.
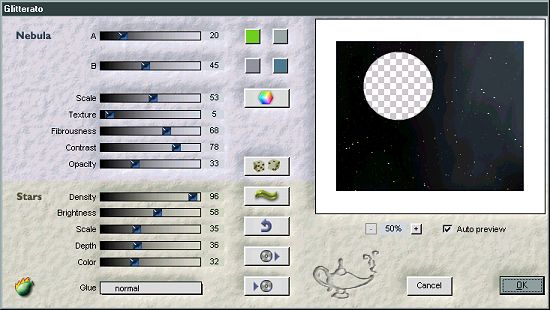
- Now make your 'Stars' layer active and go to Effects>Plugin Filters>Flaming Pear>Glitterato and apply the following settings.
- Reduce the opacity on the 'Stars' layer to 50%.
- Go to Selections>Select none.
- Make a new layer and name it 'Planet'. Flood fill it with black.
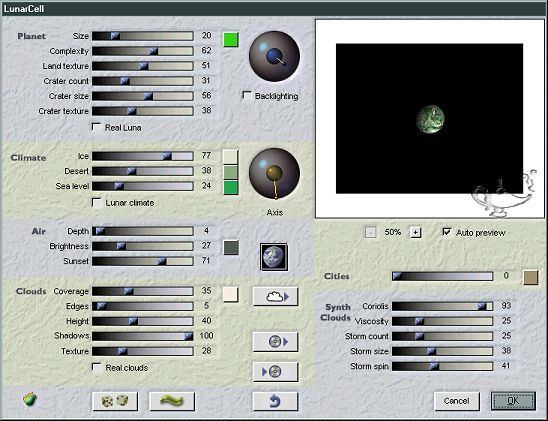
- Go to Effects>Plugin Filters>Flaming Pear>Lunar Cell and apply the following settings. Note: You can use whatever settings you want, this is just how I did it.
- Now using your magic wand again, click anywhere in the black and hit your delete key.
- Using your mover
 tool, move your planet to anywhere on your pic that you want. tool, move your planet to anywhere on your pic that you want.
- Reduce the opacity of the 'Planet' layer to 64%.
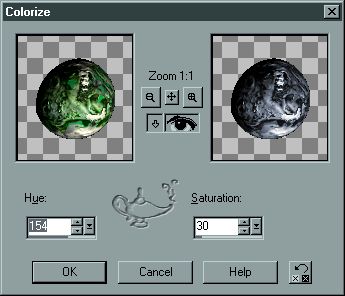
- Now if you want to colorize the moon and planet layers, now is the time to do it. Go to Colors>Colorize and find a setting that you like. This is what I used.
- Now go to Layers>Merge>All flatten.
- Go to Effects>Plugin Filters>Flaming Pear>Flood and apply the following settings.
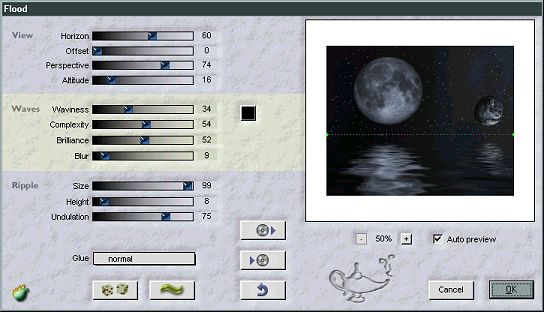
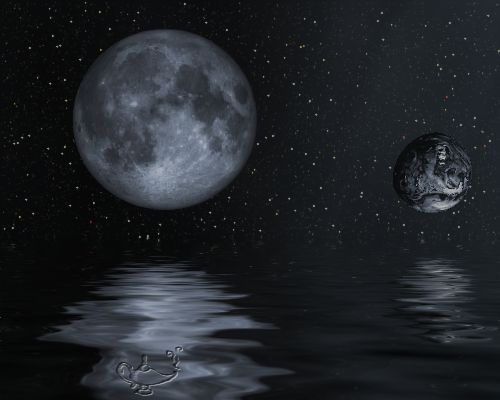
Voila!! You are done! You should have an image that resembles the one below.
Tutorial Index
Website design ©Bluegenie2 Designs
|